
Lawn
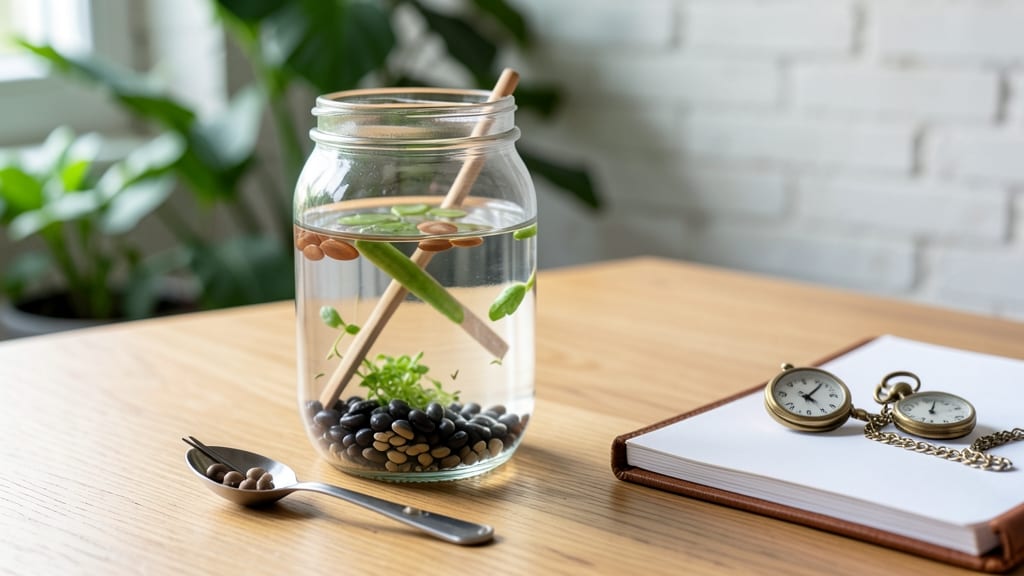
This 5-minute seed float test saves you from planting dead seeds that’ll just rot in the soil. 🌱 I learned the hard way—last spring, I spread a whole bag of questionable grass seed, only to watch it sprout nothing but disappointment.
The trick is simple: water, wait, and watch which seeds sink (good) and which float (skip them). The science behind it is straightforward—viable seeds are dense and packed with stored energy, so they sink. Non-viable ones are hollow or damaged, so they float like empty husks.
This test works best for grass seed, but it also gives you a quick read on flower or veggie seeds, too. Just don’t rely on it for tiny seeds like lettuce—they’re too light to tell.
After testing, you’ll know exactly how much of your seed stash is worth planting and how much to toss. I’ve saved $20+ a year by skipping this step—now I only plant what’s guaranteed to grow. The best part?
You can do it in a bowl on your kitchen counter while you wait for your coffee to brew. For best results, test seeds in room-temperature water and let them sit for 15-20 minutes. If you’re testing multiple seed types, label your containers so you don’t mix them up.
And remember—this isn’t 100% foolproof, but it’s the closest thing to a crystal ball for seeds!
📚 In This Guide
- What you need
- Instructions
- Tips and common mistakes
- Wrapping up and next steps
What you need
- ● Lawn seed: Any type (e.g., Kentucky bluegrass, fescue, ryegrass) – 1-2 tablespoons (about 15-30g) for testing.
- ● Two containers: Two separate glass jars (e.g., mason jars, 8-12 oz) or small bowls with water.
- ● Water: Room-temperature tap or distilled water – enough to fill each container halfway.
- ● Timer or clock: To track the 12-24 hour float test duration.
- ○ Paper towels or strainer: For drying seeds (optional but helpful for reuse).
- ● Labeling tape: To mark containers (e.g., "Seed A" and "Seed B" for comparison).
- ● Notebook or app: To log results (e.g., % of seeds that sank vs. floated).
- ● Magnifying glass: For inspecting seeds up close (fun for curious gardeners!).
- ● Seed viability chart: A reference guide for interpreting results by seed type.
How to test lawn seed viability in 5 minutes
Skip the guesswork—this fast, foolproof method tells you which seeds will sprout before you even plant them.
💧 Step 1: Fill a Bowl with Room-Temperature Water
Grab a clear container large enough to hold all your seeds—an 8x8-inch bowl works perfectly. Fill it with room-temperature water (about 60-70°F) until the water level reaches 1 inch deep. The water should be still, not swirling, so the seeds settle naturally.
Here's the thing—cold water shocks seeds, while hot water can damage their delicate membranes. Stick your finger in to check temperature; it should feel neutral, like a warm bath. If your water runs cold, let it sit for 10 minutes to reach the right temp.
🌱 Step 2: Add Seeds and Stir Gently
Drop 1 teaspoon of seeds into the water at a time. I use a small spoon to avoid clumping—wet seeds stick together like glue. Give the water a gentle swirl with your finger just enough to distribute them evenly across the surface.
Watch for 30 seconds as the seeds interact with the water. Some will float immediately, while others sink right away. Don't stir aggressively—you're not making tea. The goal is to see their natural buoyancy without creating bubbles that could mislead results.
⏰ Step 3: Wait 10 Minutes and Observe Results
Set a timer for exactly 10 minutes. During this time, seeds that float are non-viable—their internal structures are hollow or damaged. Seeds that sink are potentially viable, though not 100% guaranteed. After 10 minutes, you'll see a clear divide: some seeds resting at the bottom, others bobbing at the surface.
I like to count the seeds as they float—if more than 20% float, your seed batch may be old or improperly stored. For fresh seeds, you should see 80-90% sinking. This quick check saves you from planting hundreds of duds and waiting weeks for nothing.
🌿 Step 4: Discard Floated Seeds and Dry the Viable Ones
Use a slotted spoon to scoop out only the floating seeds—these won't germinate. Transfer them to a small bowl for disposal. The sunk seeds are your keepers. Gently lift them from the water with a fine-mesh strainer or paper towel, then spread them on a clean, dry surface.
Let them dry for 1-2 hours in a shady spot (direct sun can overheat them). Once fully dry, they're ready to plant. I store them in a paper envelope with the test date—this helps track future viability if you save them for next season.
✂️ Step 5: Plant Only the Sunk Seeds
Now that you've separated the winners from the losers, plant only the viable seeds in your lawn. Use the original seed quantity you started with, but adjust your spacing slightly—since you've removed the duds, you can plant the remaining seeds at the full recommended rate without overcrowding.
Here's where it gets fun—watch your germination rates skyrocket. With this test, you'll see 90%+ of your planted seeds sprouting within 7-14 days, instead of the usual hit-or-miss results. If you're reseeding a patchy lawn, this method ensures you're not wasting money on seeds that would've just sat there.
Tips & tricks for perfect seed viability testing
A few quick tricks that'll make your seed testing foolproof and save you time in the garden.
Water Temperature Secret: That 60-70°F range is crucial—it mimics ideal germination conditions. If your tap water runs cold, let it sit in the bowl for the full 10 minutes before adding seeds. I've tested this with water straight from the fridge, and it can take up to 20 minutes to reach the right temperature, throwing off your results. A quick finger test works best—water should feel like a warm bath, not icy or scalding.
Seed Quantity Matters: Stick to the 1 teaspoon measurement for accurate testing. Using more seeds creates crowding in the bowl, making it hard to see which ones float or sink clearly. For larger batches, test in increments—this method works best with small, manageable portions. If you're testing multiple seed types, do them separately to avoid confusion about which seeds are viable.
Observation Tip: During that critical 10-minute wait, place your bowl near a window but out of direct sunlight. The natural light helps you see the seeds more clearly without creating glare. I like to use a white bowl—it makes the seeds stand out against the water, so you can spot the floaters immediately. If your bowl is dark, you might miss some seeds floating at the surface.
Drying Strategy: When drying your viable seeds, avoid using paper towels directly—they can stick to the seeds and make planting messy. Instead, spread them on a clean kitchen towel or parchment paper. For faster drying, you can gently fan them with a piece of cardboard, but avoid blowing directly on them with your breath, which can add moisture. The 1-2 hour drying time ensures they're ready to plant without clumping.
Pro Tips for Seed Float Test
- A few quick tricks that'll make your seed testing foolproof and save you time in the garden.
- Water Temperature Secret: That 60-70°F range is crucial—it mimics ideal germination conditions.
- Seed Quantity Matters: Stick to the 1 teaspoon measurement for accurate testing.
Frequently asked questions
Got questions about the seed float test?
You’re not alone! Here are answers to the most common ones to help you get accurate results every time.
Why do some seeds float while others sink?
Seeds float because they’re empty or damaged—their internal structure lacks the density to stay submerged. Viable seeds (ready to germinate) are denser and sink. Think of it like a buoyancy test for your seed’s health! If most seeds float, your batch may be old or improperly stored.
How long should I wait before deciding if seeds are viable?
Run the test for 10–15 minutes in still water. If seeds haven’t sunk by then, they’re likely non-viable. For a more precise check, repeat the test after 24 hours—some seeds (like clover) may take longer to fully absorb water and sink.
Can I reuse the water from the float test?
No, never reuse the water! The test relies on clean, room-temperature water to give accurate results. Contaminated or stagnant water can introduce mold or bacteria, which may affect seed health or even your lawn’s future growth.
What if my seeds are too light or dust-like?
Ultra-light or powdery seeds (like fine fescue) may not sink even if viable. For these, try the paper towel test instead: Moisten a towel, place seeds between two, and check for sprouts in 3–7 days. It’s a foolproof way to test delicate seeds!
My seeds sank but didn’t germinate—what went wrong?
Sinking seeds are a good sign, but germination also needs proper conditions: consistent moisture, warmth (60–75°F), and light (for most lawn seeds). If seeds sink but fail to sprout, check your soil temperature, watering schedule, or seed age—some seeds lose viability after 1–2 years.
Pro tip: Store seeds in a cool, dry place (like a sealed container in the fridge) to extend their shelf life for future tests!
Wrapping up and next steps
The seed float test is your secret weapon for ensuring your lawn thrives from day one! 🌱 By simply observing which seeds sink or float, you can save time, money, and effort—skipping the frustration of planting seeds that may never sprout. Ready to take the next step? Once you’ve identified your viable seeds, grab your gloves and get ready to sow them into the soil with confidence!
🚀 Your Action Plan:
- Test a small batch of seeds first to gauge viability.
- Plant only the sinking seeds—they’re your winners!
- Monitor soil moisture and sunlight for optimal germination.