
Lawn
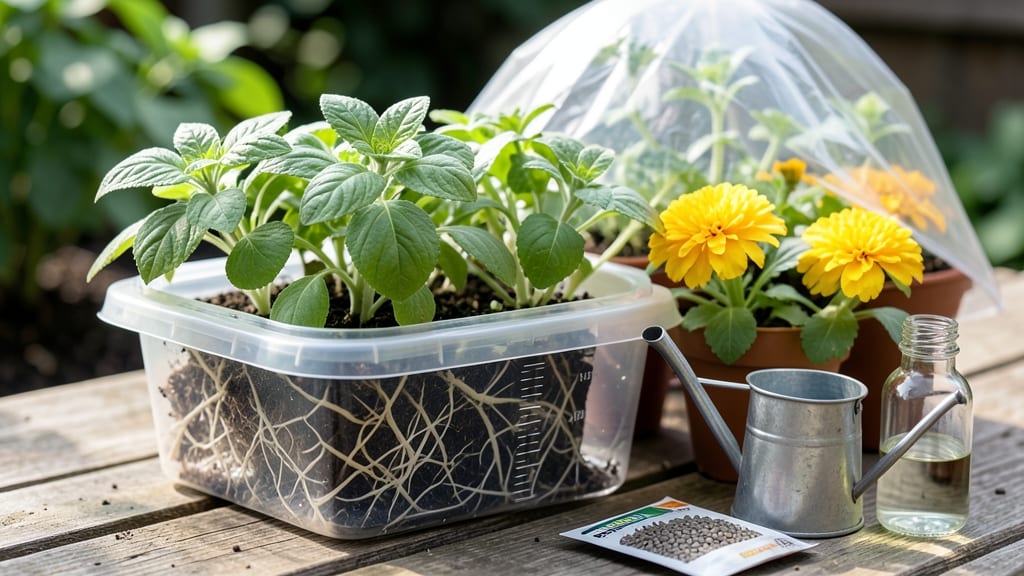
Self-watering seed starters turn germination from a daily chore into a set-it-and-forget-it success. 🌱 I’ve watched dozens of seedlings fail to sprout because of inconsistent moisture—until I discovered how a simple reservoir system keeps roots happy without my constant attention.
The right setup means fewer wilted sprouts and more robust seedlings ready for transplanting.
Here’s the beauty: you only need a shallow tray, a clear container, and some pebbles to create the wicking system. No fancy equipment, no guesswork—just consistent moisture at the root level.
I’ve used this method for grass seed, herbs, and even delicate flowers, and the results speak for themselves: stronger starts and fewer casualties. Perfect for busy gardeners or anyone tired of checking moisture every other day.
By the time your seedlings are ready to move outdoors, they’ll be stocky and dark green—not the leggy, weak specimens that struggle after transplanting. The self-watering system mimics natural rainfall, so roots grow deep and strong from the beginning.
You’ll notice the difference immediately in how quickly they establish after being planted in the lawn.
Works for any seed type, from grass to vegetables, and scales from a single tray to a full greenhouse setup. The key is keeping the reservoir full and the seeds just barely covered—no overwatering, no drowning. Let’s get those seeds sprouting reliably, every single time.
📚 In This Guide
- What you need
- Instructions
- Tips and common mistakes
- Wrapping up and next steps
What you need
- ● Clear plastic bottle (16–32 oz): A clean, empty soda or water bottle (e.g., 2-liter for larger setups).
- ● Scissors or utility knife: For precise cutting (safety goggles recommended!).
- ● Seed-starting mix (1–2 cups): Lightweight, sterile potting soil (avoid garden soil—it compacts!).
- ● Seeds of choice (1–2 tbsp): Grass seed, wildflower mix, or veggie seeds (check planting depth on the packet!).
- ● Water (room temp, ½–1 cup): Just enough to moisten the soil—no soggy messes!
- ● Ruler or measuring tape: To mark cutting lines (e.g., 2–3 inches from the bottle’s base).
- ○ Duct tape or waterproof sealant (optional but helpful): To secure cuts and prevent leaks.
- ● Drill with small bit: For cleaner holes (if cutting isn’t your style!).
- ● Spray bottle: For gentle watering if your bottle lacks a spout.
- ● Label markers: To track seed types and planting dates.
- ● Tray or saucer: To catch overflow (place under the bottle).
- ● Felt or wicking material: For advanced setups (e.g., placing it between soil layers for passive watering).
Step-by-Step instructions for building self-watering seed starters
Here's the foolproof method I use to create self-watering seed trays that eliminate daily watering and boost germination rates.
🪴 Step 1: Assemble the Base Reservoir
Start with a shallow plastic container—10-12 inches wide and 3-4 inches deep—that will serve as your water reservoir. I like to use a clean, food-grade plastic storage bin with a tight-fitting lid. Cut a 1-inch wide strip along the bottom edge of the lid using a utility knife, being careful to stop ½ inch from the corners to create drainage slots.
Place the modified lid back on the container—this creates a removable water reservoir that will feed your seedlings through capillary action. The ½ inch gap at the corners prevents soil from spilling into the reservoir while still allowing water to rise. For 4 seed trays, you'll need 4 identical containers—I use the same size for consistency in water distribution.
💧 Step 2: Prepare the Wicking Layer
Line the bottom of each seed tray with a 2-inch square of landscape fabric or a thick layer of cotton felt. This acts as your wicking layer, drawing moisture upward from the reservoir. The fabric should extend slightly over the tray edges to create a barrier—this prevents soil from falling into the water below while still allowing water to travel upward.
Place each tray directly onto the reservoir lid, ensuring the fabric makes contact with the water. You'll see the fabric immediately begin to absorb moisture—this is your visual confirmation that the system is working. For 4 trays, you'll need 4 squares of fabric, each 10-12 inches wide to fit snugly.
🌱 Step 3: Add Moisture-Retentive Growing Medium
Fill each tray with a 2:1:1 mix of peat moss, perlite, and vermiculite—this blend holds moisture while preventing compaction. I like to pre-moisten the mix until it's damp but not dripping, then add it to the trays in ½ inch layers, gently pressing down to eliminate air pockets. For 4 trays, you'll need roughly 1 gallon total of this mix.
Leave a ½ inch gap at the top of each tray—this prevents soil from spilling when you water the reservoir. The surface should feel evenly moist but not soggy. Here's the thing—this mix stays damp for 7-10 days without additional watering, which is perfect for germination. You'll know it's working when the top layer stays consistently moist without wilting.
⏰ Step 4: Sow Seeds and Maintain Water Level
Press seeds into the soil at the correct depth—typically ¼ inch deep—and cover lightly with additional mix. Space them according to their spacing requirements (check the seed packet). For 4 trays, you'll need 4 seed packets of your chosen variety. Once planted, fill the reservoir with water until it reaches ½ inch below the tray bottom.
Here's where it gets magical: the fabric wicks water upward just enough to keep seeds moist without drowning them. Check the reservoir every 3-4 days and top off with water as needed—you'll rarely need to add more than ¼ cup per tray during germination. The key is to keep the reservoir full; the system regulates moisture delivery automatically.
☀️ Step 5: Provide Light and Monitor Growth
Place your seed trays under grow lights positioned 4-6 inches above the seedlings. I use a simple LED setup on a timer for 14-16 hours daily. You'll see the first true leaves emerge in 7-14 days, depending on the seed type. The beauty of this system is that you won't need to water again until the seedlings develop their first set of true leaves.
Watch for even moisture distribution—if you notice dry spots, gently press the fabric against the reservoir to reset the wicking action. Once seedlings reach 2-3 inches tall, you can transplant them directly into the garden or larger pots without disturbing the root system. The self-watering design means you can walk away for 2 weeks without worrying about dried-out seedlings.
Tips & tricks for perfect self-watering seed starters
These simple adjustments will help you maximize germination success and avoid common pitfalls with your hands-off seed starter system.
Material Selection: For the reservoir containers, opt for food-grade plastic bins with lids that have a snug fit—this prevents leaks and maintains consistent water levels. I've found that clear plastic works best because you can easily monitor water levels without opening the lid. If you're using opaque containers, mark the water level with a permanent marker at the ½-inch mark below the tray bottom for easy reference.
Wicking Layer Optimization: In Step 2, when preparing the wicking layer, make sure the landscape fabric or cotton felt makes complete contact with both the reservoir and the tray edges. Any gaps can disrupt the capillary action, leading to uneven moisture distribution. For extra reliability, I like to fold the fabric edges slightly upward along the tray sides—this creates a better seal and prevents soil from slipping into the reservoir.
Soil Mix Consistency: The 2:1:1 ratio of peat moss, perlite, and vermiculite is crucial for proper moisture retention and aeration. To ensure consistency, I recommend pre-mixing all components in a large container before dividing them into trays. This prevents uneven distribution of the components, which can create dry pockets where seeds might not germinate. After adding the soil mix, give it a gentle press with your fingers to eliminate air pockets—this helps maintain even moisture throughout the tray.
Lighting Strategy: While the 14-16 hour daily light requirement is ideal, I've found that seedlings actually benefit from a gradual light increase during their first week. Start with 12 hours of light for the first 3-4 days, then increase to 14-16 hours. This mimics natural progression and helps prevent leggy seedlings. Position your grow lights slightly higher (6 inches above) during the first week, then lower to 4-5 inches as seedlings grow taller.
Pro Tips for Self Watering Seed Starter
- These simple adjustments will help you maximize germination success and avoid common pitfalls with your hands-off seed starter system.
- Material Selection: For the reservoir containers, opt for food-grade plastic bins with lids that have a snug fit—this prevents leaks and maintains consistent water levels.
- Wicking Layer Optimization: In Step 2, when preparing the wicking layer, make sure the landscape fabric or cotton felt makes complete contact with both the reservoir and the tray edges.
Frequently asked questions
Got questions about self-watering seed starters? You’re not alone—this hands-off gardening hack is game-changing, but it’s natural to have a few curiosities before diving in. Below, we’ve rounded up the most common queries to help you grow with confidence!
How do self-watering seed starters actually work?
These clever setups use a wicking system or reservoir design to deliver moisture to seeds as they need it. The bottom chamber holds water, which slowly travels upward via capillary action or a wick, keeping soil consistently damp without overwatering. Perfect for forgetful gardeners or busy weekends!
When is the best time to start seeds in a self-watering starter?
Timing depends on your climate and seed type, but a general rule is to start 4–6 weeks before your last frost date. For cool-season grasses (like fescue or ryegrass), aim for early spring or late summer. Warm-season grasses (like Bermuda or Zoysia) thrive when soil temps hit 60°F+. Check your seed packet for specifics!
Can I reuse a self-watering seed starter for multiple batches?
Clean and disinfect the container between uses to prevent mold or disease. Scrub with soapy water, rinse thoroughly, and soak in a 1:10 bleach-water solution (or vinegar) for 10 minutes. Let dry completely before reassembling. Pro tip: Use fresh potting mix each time to avoid soil-borne pathogens.
What should I do if my seeds aren’t germinating?
First, check for consistent moisture—the reservoir should never run dry. Ensure seeds are planted at the correct depth (usually 2x their width) and kept in a warm, bright spot (70–85°F for most grasses). If using a wick, confirm it’s not tangled or clogged. For stubborn seeds, try a seed starter mat or bottom heat for extra encouragement.
Are self-watering starters better than regular seed trays?
For beginners or busy gardeners, yes! They eliminate the guesswork of watering and reduce transplant shock by keeping roots hydrated. However, traditional trays are cheaper and work well if you’re hands-on. Self-watering starters shine for large batches or delicate seeds (like fine fescue). Think of them as a low-maintenance upgrade—not a replacement!
What’s the easiest DIY self-watering starter I can make?
Here’s a simple hack: Use a plastic container with a lid (like a takeout tub) and poke drainage holes in the bottom. Fill it halfway with water, then add a layer of pebbles or a coffee filter to separate the water from the soil. Plant seeds in potting mix on top—done! For a wick version, cut a strip of cotton rope to connect the soil to the water reservoir.
Wrapping up and next steps
Ready to transform your lawn into a lush, thriving paradise? Self-watering seed starters make germination effortless—no more guessing when to water or worrying about soggy seeds! 🌱 With the right setup, you’ll enjoy consistent, stress-free growth from day one.
Now that you’re armed with the best materials and answers to common questions, it’s time to roll up your sleeves and start sowing.
Your next step? Pick your favorite seeds, assemble your starter, and watch your lawn dreams take root! Happy gardening—your future lawn will thank you! 🌿